Just downloaded Batch Compiler and don't know what the hell to do with it? This little tutorial should cover everything you need to know from how to set it up to how to compile your first map.
First things first, if you don't already have the program head over to the downloads page, pick it up and install it. The installer is a standard Windows installer so I will leave that to your imagination.
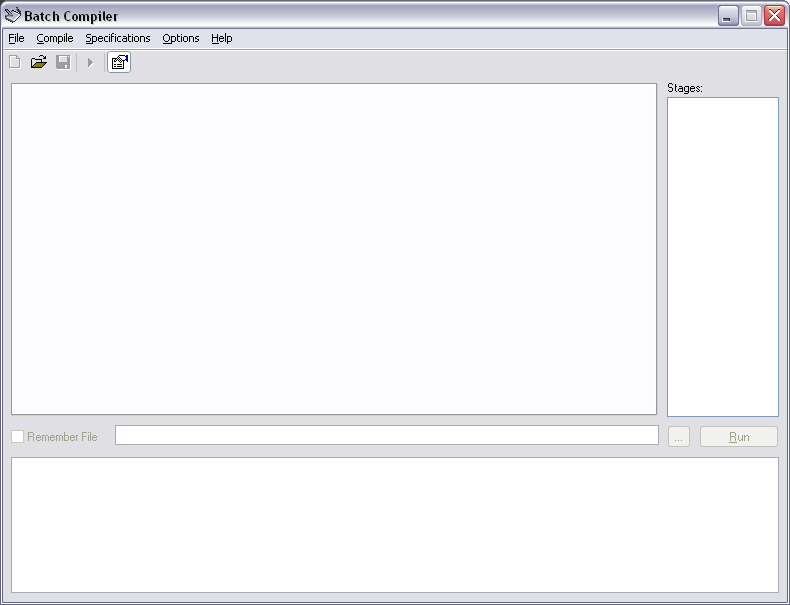
Once you have installed Batch Compiler start the program up. If you get an error when you run it then you need the .NET framework which is linked to on the downloads page. Batch Compiler should look like this when you start it up:
Now some of you may have noticed that there are no controls for compiling your map on the form. This is because Batch Compiler 3.0.0 (and up) work with Batch Compiler Specification (BCS) files. These wonderful dynamic configuration files allow you to use Batch Compiler to compile just about anything that makes use of a batch file, be it a Half-Life 2 map (which this tutorial works on), a map for another game, or even such things as applications.
Before we take a look at these specifications, it is a good idea to make sure they are all up to date. To do this, select Check For Updates from the Help menu. This will bring up a dialog which can be used to update all official specification files. Clicking Update will do just that. It is reccomended that you check for updates every so often to make sure you have the latest specification for the latest updates to the tools.
Six specifications come with Batch Compiler (they can be found under the Specifications menu). They are:
- Quake Tools Legacy: The original Quake Tools specification.
- Source Tools Advanced: The advanced Source Tools specification. Recommended for experianced users.
- SourceTools Normal: The standard Source Tools specification. Recommended for new users.
- Zoners Tools Advanced: The advanced Zoners Tools specification. Recommended for experianced users.
- Zoners Tools Legacy: The original Zoners Tools specification.
- Zoners Tools Normal: The standard Zoners Tools specification. Recommended for new users.
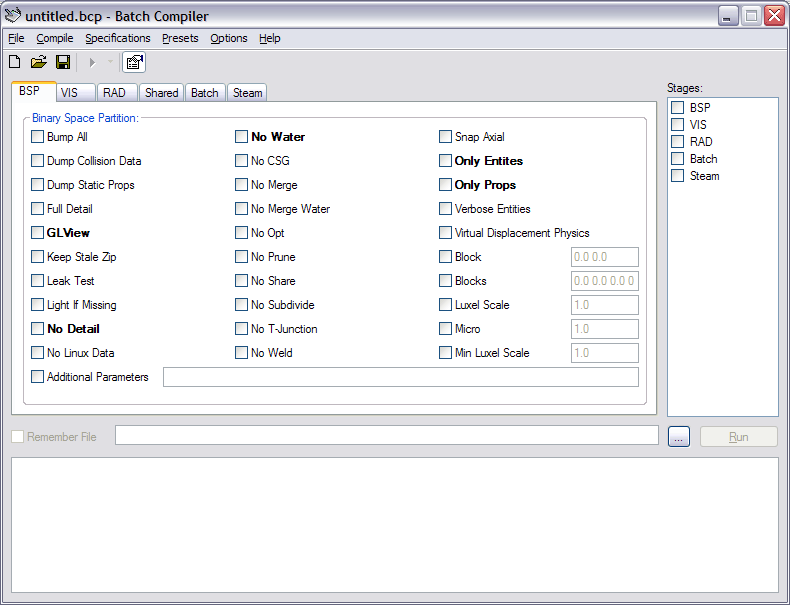
You're welcome to use any specification you wish, I would, however, recommend the Source Tools Normal specification because if you are reading this, you are probably a new user. You can always upgrade to the Source Tools Advanced specification latter. If you are reading this tutorial you are setting Batch Compiler up for Source mapping so make sure you pick one of the specifications that has the word Source in it. To load the specification simply click it in the Specifications menu. Your screen should look like this:
Now that we have the specification open, we need to proceed to set Batch Compiler up to use it. In the Options menu click the Setup button. Your screen should look like this:
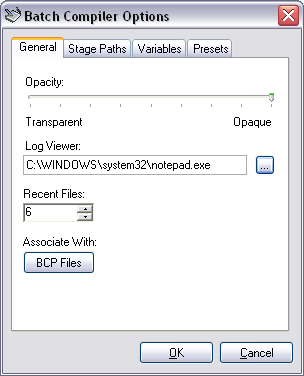
The General tab contains information specific to the editor itself. Its options are:
- Opacity: Set the opacity of the program (make it see through).
- Log Viewer: Set the program Batch Compiler uses to view LOG files.
- Recent Files: Set the number of recent files to store, this is used for both BCP and MAP files.
- Associate With: Press the BCP Files button to associate BCP files with the editor. When associated, double clicking a BCP (Batch Compiler Preset) file will launch Batch Compiler with that preset loaded.
When you first start Batch Compiler, Batch Compiler will try to find NotePad using system path variables and set it as your Log Viewer. If your Log Viewer is not set you will have to manually browse for an appropriate application. Some appropriate standard windows applications include NotePad and WordPad.
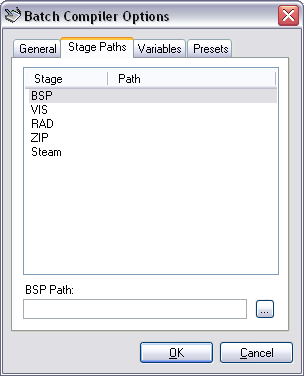
Once you are happy with your settings in the General tab, move over to the Stage Paths tab. Your screen should look like this:
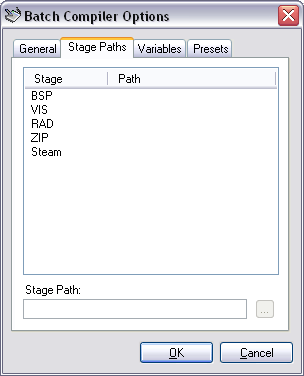
The Stage Paths tab allows you to set the paths to all the tools used in your current specification. To begin specifying the paths select the BSP tool from the list of tools on your screen. Once selected the bottom text box on the form changes its caption to read BSP Path, its browse button also becomes active as shown below:
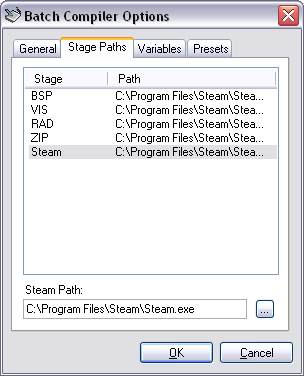
Now simply press the browse button (the button with the three dots) and browse to the file located on your hard drive. This file is part of the Source SDK and can be found in the folder ...\Steam\SteamApps\address@host.com\sourcesdk\bin. Continue this process for all the reaming tools. Your screen should look something like this:
Once you are happy with your settings in the Stage Paths tab, move over to the Variables tab. Your screen should look like this:
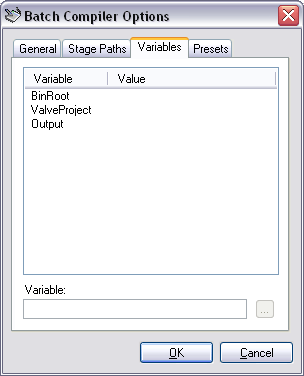
The Variables tab allows you to set the paths to various other resources used in your current specification. These paths are set in a similar mannor to those of the Stage Paths tab and should be set as follows:
BinRoot: (Source SDK bin directory.)
- All MODs: ...\Steam\SteamApps\address@host.com\sourcesdk\bin
ValveProject: (GameInfo.txt directory.)
- Half-Life 2: ...\Steam\SteamApps\address@host.com\half-life 2\hl2
- Half-Life 2: Deathmatch: ...\Steam\SteamApps\address@host.com\half-life 2 deathmatch\hl2mp
- Counter-Strike: Source: ...\Steam\SteamApps\address@host.com\counter-strike source\cstrike
- Day of Defeat: Source: ...\Steam\SteamApps\address@host.com\day of defeat source\dod
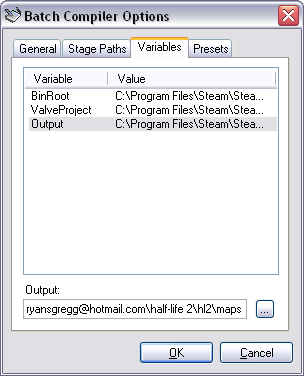
Output: (BSP output directory.)
- Half-Life 2: ...\Steam\SteamApps\address@host.com\half-life 2\hl2\maps
- Half-Life 2: Deathmatch: ...\Steam\SteamApps\address@host.com\half-life 2 deathmatch\hl2mp\maps
- Counter-Strike: Source: ...\Steam\SteamApps\address@host.com\counter-strike source\cstrike\maps
- Day of Defeat: Source: ...\Steam\SteamApps\address@host.com\day of defeat source\dod\maps
Your form should look something like this when you're all done:
Once you are happy with your paths click the OK button to return to Batch Compiler's main screen. We are now going to go through the steps for creating a generic "Fast" compile preset which you can use for all your maps. Please continue to the next page.
Extra App Id set to 211, but no SteamAppId
As the log is generated with the map details I am guessing this is a path error is it?
Aprreciate any advice as usual, thanks
And also this tool is great. I used to use command promt and do every thing separately.
Help?
Could you maybe provide a full screenshot of the stage paths listed? And likewise for the variables?
Other than that, I seem to be fine.
http://files.filefront.com/rooms+captainterror2log/;13444575
materialPath: E:\steam\steamapps\wardino389\half-life 2 deathmatch\hl2mp\materials
Loading C:\Users\Wardino388\Desktop\faben's project\gm_Fabens_Buildv3.vmf
fixing up env_cubemap materials on brush sides...
0...1...2...3...4...5...6...7...8...9...10**** leaked ****
Entity info_teleport_destination (-3142.00 -6008.00 -9419.00) leaked!
Processing areas...done (0)
Building Faces...done (0)
FixTjuncs...
PruneNodes...
WriteBSP...
done (0)
Creating default cubemaps for env_cubemap using skybox materials:
skybox/sky_day01_08*.vmt
Run buildcubemaps in the engine to get the correct cube maps.
No such variable "$hdrbasetexture" for material "skybox/sky_day01_08rt"
Can't load skybox file skybox/sky_day01_08 to build the default cubemap!
Finding displacement neighbors...
Finding lightmap sample positions...
Displacement Alpha : 0...1...2...3...4...5...6...7...8...9...10
Building Physics collision data...
done (0) (47093 bytes)
Placing detail props : 0...1...2...3...4...5...6...7...8...9...10
Water found with no water_lod_control entity, creating a default one.
Compacting texture/material tables...
Reduced 261 texinfos to 135
Reduced 25 texdatas to 22 (706 bytes to 554)
Writing C:\Users\Wardino388\Desktop\faben's project\gm_Fabens_Buildv3.bsp
3 seconds elapsed
2 threads
reading c:\users\wardino388\desktop\faben's project\gm_Fabens_Buildv3.bsp
reading c:\users\wardino388\desktop\faben's project\gm_Fabens_Buildv3.prt
LoadPortals: couldn't read c:\users\wardino388\desktop\faben's project\gm_Fabens_Buildv3.prt
materialPath: E:\steam\steamapps\wardino389\half-life 2 deathmatch\hl2mp\materials
Loading C:\Users\Wardino388\Desktop\faben's project\gm_Fabens_Buildv3.vmf
fixing up env_cubemap materials on brush sides...
0...1...2...3...4...5...6...7...8...9...10**** leaked ****
Entity info_teleport_destination (-3142.00 -6008.00 -9419.00) leaked!
Processing areas...done (0)
Building Faces...done (0)
FixTjuncs...
PruneNodes...
WriteBSP...
done (1)
Creating default cubemaps for env_cubemap using skybox materials:
skybox/sky_day01_08*.vmt
Run buildcubemaps in the engine to get the correct cube maps.
No such variable "$hdrbasetexture" for material "skybox/sky_day01_08rt"
Can't load skybox file skybox/sky_day01_08 to build the default cubemap!
Finding displacement neighbors...
Finding lightmap sample positions...
Displacement Alpha : 0...1...2...3...4...5...6...7...8...9...10
Building Physics collision data...
done (0) (47093 bytes)
Placing detail props : 0...1...2...3...4...5...6...7...8...9...10
Water found with no water_lod_control entity, creating a default one.
Compacting texture/material tables...
Reduced 261 texinfos to 135
Reduced 25 texdatas to 22 (706 bytes to 554)
Writing C:\Users\Wardino388\Desktop\faben's project\gm_Fabens_Buildv3.bsp
4 seconds elapsed
2 threads
reading c:\users\wardino388\desktop\faben's project\gm_Fabens_Buildv3.bsp
reading c:\users\wardino388\desktop\faben's project\gm_Fabens_Buildv3.prt
LoadPortals: couldn't read c:\users\wardino388\desktop\faben's project\gm_Fabens_Buildv3.prt
Hey guys, I added Garry's Mod to the base settings for the Steam tab. You can now select it in the drop-down game menu. This is the "Steam.BCI" file that goes in "Specifications" in your Batch Compiler folder.